
Download Any Webpage As A PDF With .NET 8 And Puppeteer
 Photo from Unsplash
Originally Posted On: https://medium.com/@vasovski/download-any-webpage-as-a-pdf-with-net-8-and-puppeteer-ba3477123cc9
In this post, I will show an example of how you can utilize Puppeteer in c# .NET to create functionality that can download any publicly available website as a PDF file.
I am aware that one can already do something similar by clicking CTRL + Print Screen and selecting PDF as the destination printer, but this option is not very UI-friendly and requires too many steps to get to the end result.
A good example is a website that lists people’s profile biographies. A law firm, for example, will likely have a directory of its lawyers on their website. Each profile will have a dedicated page containing information on the lawyer.
A nice functionality would be to create a “download resume” button that dynamically creates and downloads a PDF CV of the lawyer. We want this functionality to be fully dynamic and not rely on a CMS editor uploading a PDF in the back end. Instead, my goal is to use the information on the profile page to generate a professional PDF that is not simply a screenshot of the website.
Quick note: While I’m using PuppeteerSharp here because I wanted to explore the headless browser approach, there are other .NET libraries like IronPDF that handle PDF generation differently — I’ll touch on this at the end.
What is Puppeteer?
Puppeteer is a Node.js library which provides a high-level API to control Chrome/Chromium over the DevTools Protocol. Puppeteer runs in headless mode by default, but can be configured to run in full (“headful”) Chrome/Chromium.
(https://github.com/puppeteer/puppeteer)
In other words, it uses the same Chrome browser technology to access websites. This allows it to do different cool things with the website’s output, such as turning it into a PDF file.
Because Puppeteer is in Node.js, we need to find an easy way to use it in .NET without having to learn Javascript.
That’s where PuppeteerSharp comes into play. PuppeteerSharp is a .NET port of the official Node.js Puppeteer.
Check out my other tutorial for a simple API setup in C# .NET 8 https://medium.com/@vasovski/simple-net-8-api-tutorial-get-started-quickly-9622f796508c
Setup an API controller
I think using an API for this is a good option. This way, you can externalize this logic from any specific project.
I am working with Visual Studio and am using a c# .NET 8 project.
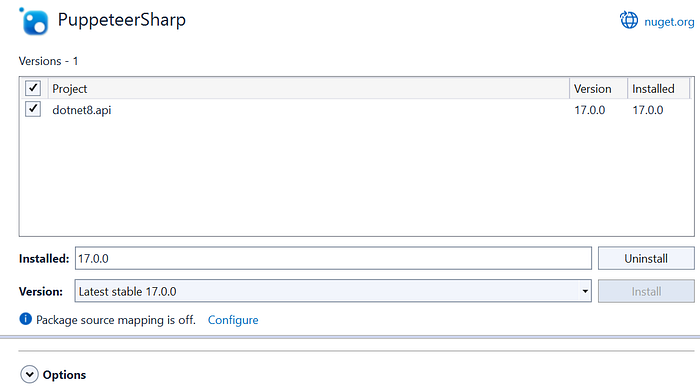
- Install PuppeteerSharp in your .NET project
2. Create a new API controller
Create a new API controller called PdfApiController and configure the desired routing. In my example, I want the API endpoint to be /api/pdf/generate.
The endpoint should also accept two parameters:
- url— the URL that needs to be converted into a PDF.
- name — the name of the PDF file that will be generated for the end user
[ApiController][Route("api/pdf")]public class PdfAPIController : ControllerBase{ [HttpGet] [Route("generate")] public TaskGenerate(string url, string name) { try { throw new NotImplementedException(); } catch (Exception) { throw; } }} 3. Write the PDF generation logic
Now, it’s time to fill in the PDF functionality using PuppeteerSharp.
[ApiController] [Route("api/pdf")] public class PdfAPIController : ControllerBase { private string ChromiumPath => Path.Combine(Path.GetTempPath()); [HttpGet] [Route("generate")] public async Task Generate(string url, string name) { try { if (string.IsNullOrEmpty(url)) { return BadRequest("The URL parameter is mandatory."); } if (string.IsNullOrEmpty(name)) { return BadRequest("The Name parameter is mandatory."); } // generate PDF with puppeteer var bf = await InitializeBrowser(); var pdfFileName = name + ".pdf"; byte[] pdfBytes = null; using (var browser = await Puppeteer.LaunchAsync(new LaunchOptions { Headless = true, ExecutablePath = bf.GetExecutablePath(Chrome.DefaultBuildId) })) { using (var page = await browser.NewPageAsync()) { await page.EmulateMediaTypeAsync(PuppeteerSharp.Media.MediaType.Print); await page.SetViewportAsync(new ViewPortOptions { Width = 1200, Height = 800 }); await page.GoToAsync(url); await page.EvaluateExpressionHandleAsync("document.fonts.ready"); var contentSize = await page.EvaluateFunctionAsync<dynamic>("() => { return { width: document.documentElement.scrollWidth, height: document.documentElement.scrollHeight }; }"); // Set the viewport size based on the actual content size await page.SetViewportAsync(new ViewPortOptions { Width = (int)contentSize.width, Height = (int)contentSize.height }); pdfBytes = await page.PdfDataAsync(new PdfOptions() { PrintBackground = true, Height = (int)contentSize.height, Width = (int)contentSize.width, }); } } var streamResult = new MemoryStream(pdfBytes); return File(streamResult, "application/pdf", pdfFileName); } catch (Exception) { throw; } } private async Task InitializeBrowser() { BrowserFetcher bf = null; using (var browserFetcher = new BrowserFetcher(new BrowserFetcherOptions { Path = ChromiumPath })) { await browserFetcher.DownloadAsync(Chrome.DefaultBuildId); bf = browserFetcher; } return bf; } }There is quite a bit going on in the API controller, so let’s review some of the code’s key areas.
- First, you set some input validation. If any of the parameters are missing, the controller should return a BadRequest response.
- Next, you need to initialize a headless chromium instance with Puppeteer. This allows the application to emulate a Chromium-based browser to visit the destination URL.
- Next, you need to configure the browser instance. In the example above, I specified the size of the viewport to 1200 x 800. You can change this or fully remove it to use the puppeteer defaults. In my experience, you might need to play around with the dimensions to achieve what you need.
- Next, you pass the URL of the website that needs to be converted to PDF.
- A good idea is to also wait for any Javascript to load before rendering the page, this is to avoid missing areas in the PDF. In the example, I am just waiting for the fonts to be loaded g with “document.fonts.ready”
- You can also go a step further and actually get the real dimensions of the page content by calling a JS script that calculates the width and height of the DOM object. You can use these values to set the size of the PDF document. This step is optional but really nice to have, and you can see how I did it in the code block above.
- Finally, you get the PDF object by calling “.PdfDataAsync,” which is then returned to the client in a “File()” response.
Testing the functionality
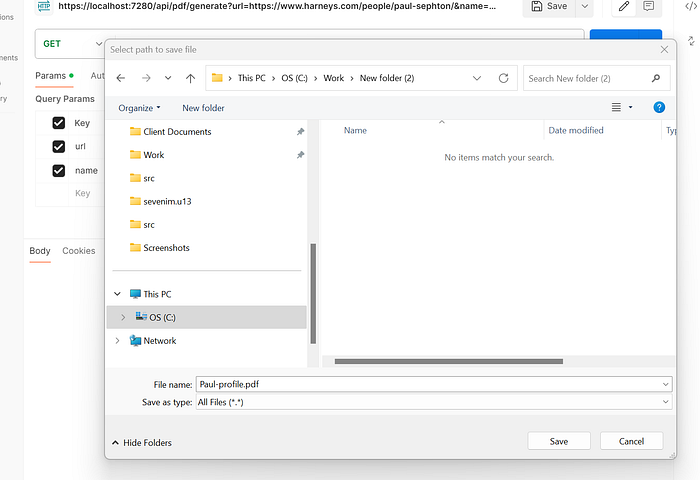
Run the solution, and call the endpoint /api/pdf/generate from Postman or Insomnia with the two parameters:
- url — https://www.harneys.com/people/paul-sephton/ (example of a law firm profile)
- name — Paul
Then, hit Send and Download to trigger a response download.

You should get the Save As prompt that lets you select a download location. You can also see that the file name is as expected (Paul.pdf)
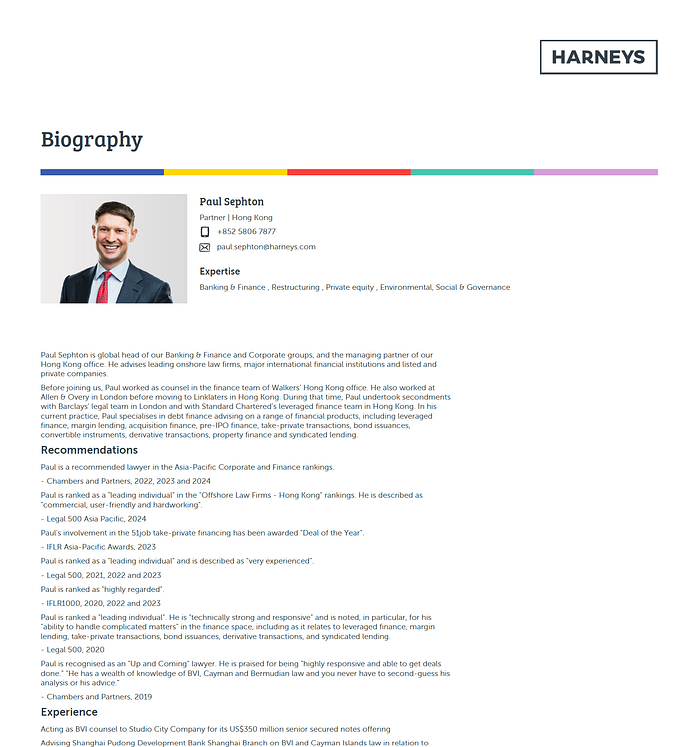
If you open the saved file, you will see a nicely rendered PDF version of the lawyers’ profile page.
Few things to consider
- The example works best when the destination website has special CSS rules for print. Puppeteer can use the print style to render the PDF. It’s not the best practice to directly convert WEB to PDF; it doesn’t look as good.
- You might need to tweak any JS scripts, for example, to prevent the cookie banner from appearing in the PDF.
- Puppeteer uses a headless browser. It’s headless because it’s not tied to a specific server. This is great because it means that it can run on serverless setups like the cloud. At the moment, Azure Cloud has some issues running it, so the best setup is to run the API above on an Azure function and then have other services call this function. This has proven to work really well.
- If the destination website has a firewall or some sort of automated traffic blocking, you might need to do some networking work to make sure that the PDF generator API application can access the destination URL.
Alternative Approach with IronPDF
While working on this project, I also looked into IronPDF, which takes a different architectural approach worth considering depending on your needs.
The main difference is that IronPDF doesn’t require managing a headless browser instance. With PuppeteerSharp, you need to download Chromium (as you saw with the BrowserFetcher code), manage its lifecycle, and deal with potential Azure deployment issues I mentioned. IronPDF has its Chrome rendering engine built-in, which you can reference the library and call the conversion methods directly.
Here’s what the same functionality would look like:
var renderer = new ChromePdfRenderer();var pdf = await renderer.RenderUrlAsPdfAsync(url);return File(pdf.BinaryData, "application/pdf", $"{name}.pdf");No browser initialization or viewport configuration needed (though you can if you want). It handles the JavaScript rendering automatically.
IronPDF deploys more easily to Azure and other cloud platforms since there’s no external browser dependency. It also handles CSS print styles and maintains text selectability by default. While it primarily targets .NET, they’ve expanded to Java, Python, and Node.js if you need consistency across different tech stacks.
I went with PuppeteerSharp for this tutorial because I wanted fine-grained control over the browser behavior and the ability to inject custom JavaScript. But if you’re looking for something that “just works” without the headless browser complexity, IronPDF is worth checking out.
Hope this tutorial was helpful. PuppeteerSharp is a great tool that can be very powerful in certain cases.
Information contained on this page is provided by an independent third-party content provider. XPRMedia and this Site make no warranties or representations in connection therewith. If you are affiliated with this page and would like it removed please contact [email protected]
